
Ski Touring the Wapta Traverse: Complete Guide
Do you dream of doing the Wapta traverse? Do any of the following questions sound familiar…
What gear would I need? Is there glacier travel? Could I do the Wapta Traverse in a single day push? These might be questions you have thought about when considering doing the Wapta ski tour for the first time, or even the second or third time. As it turns out these are a few of the questions, I hope to draw upon in this post.
What is the Wapta Traverse?
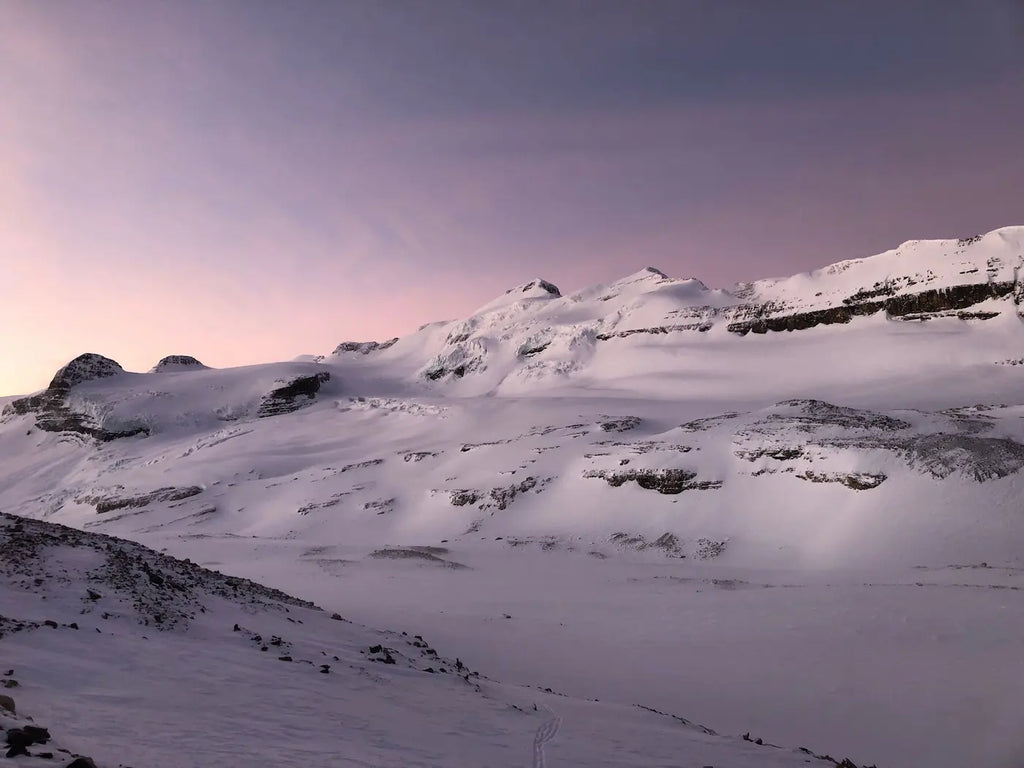
For backcountry splitboarders and skiers looking for a true adventure, the Wapta is an experience not to be missed! This classic Canadian Rockies tour offers stunning scenery, thrilling descents, options to incorporate backcountry alpine huts, and challenging terrain that will test even the most seasoned riders.
The Wapta Traverse is a North/South trending ski tour located on the Wapta Icefield. The term “Wapta Icefields” is typically used to describe an area of several hundred square kilometers that includes both the Wapta and Waputik Icefields.
Wapta means “running water” in Cree and refers to the second tallest waterfall in western Canada, Takakkaw Falls, which drains the Daly Glacier at the southern end of the Waputik Icefield.
Wapta Traverse Route Options

There are many route options and combinations for doing the Wapta Traverse. The most common is a 4 or 5 day backcountry hut trip traveling North to South. Running loosely from Peyto Lake in the North, to Sherbrooke Lake in the South, this route combination is 47 kms with 1860m elevation gain and 2130m elevation loss.
The Wapta straddles the continental divide on the border of British Columbia and Alberta, Canada. This hydrographic landmark is also the divide between Banff National Park to the East and Yoho National Park to the West. This area has seen adventurers with low tech ski touring setups exploring here as early as the winter of 1932.
Basic Wapta Traverse Skill Requirements
Besides having the endurance, friends and gear to complete the Wapta Traverse ski tour, at bare minimum backcountry splitboarders and skiers should have the 3 following skill sets:
1. The ability to ski or snowboard in steep and at times complex backcountry terrain.
2. Have a strong knowledge and experience in glacier travel and crevasse rescue situations.
3. Have the ability to navigate complex avalanche terrain.
If you do not have these 3 basic skill sets, the Wapta Traverse is not the objective for you...yet.
If you need support developing these skill sets, there are many resources, courses, communities, and guides that can help you to develop the skills needed to be successful for this type of complex objective.
Wapta Traverse Advanced Skill Requirements

This expansive zone of low angle terrain links many snowfields and glaciers with many peaks! For those interested there are many mountaineering opportunities available while completing the traverse.
Summit objectives while on the Wapta include noteworthy peaks such as Mt Olive, Gordon, Rhonda, St Nicholas Peak, Mount Daly and many more. The highest objective and often considered the crown gem of the traverse is Mt Balfour with its summit at 10,735 ft (3,272m).
Some of these peaks have very straightforward approaches and descents with no more skill required than basic glacier travel and crevasse rescue. However some of these routes require much more advanced skills including narrow ridge traverses with significant exposure, the ability to climb snow and ice, set up anchors, belay and rappels as needed for the given situation.
The most classic route on Mt Balfour involves some route finding, down climbing, bootpacking, and requires an ice axe for the final part of the ascent.
Wapta Traverse Ski Tour Risks
Risks include avalanches, crevasses, terrain, extreme temperatures, white outs, route finding and getting lost, injuries, limited information and communication access once out there.
There are many risks on the Wapta, and these are just a few to help you get your mind tuned into the considerations needed for this type of undertaking.
Objectively you have avalanches, crevasses, and of course complex mountainous terrain with cliffs, ice seracs, rock fall, cornices, terrain traps and all sorts of hazards.
Remoteness
One of the biggest risks on the Wapta is simply the remoteness of where you are. This could be a factor that is highly underestimated, especially if you are coming from Europe or somewhere else where you are perhaps not used to the exposure of being in a very remote space.
Communication
Your ability to communicate, access information, and even escape are limited in a place like this. Route finding and getting lost are also real possibilities. These risks can be mitigated by utilizing technology with downloadable GPX files for tracking. But even these can be with fault.Batteries can die and someone's else's route can be misleading. Consider also taking a physical copy of a map with you and some form of printed route description. You or someone in your group getting injured is also a real possibility.
Injuries
A simple twisted knee, or concussion, can quickly turn into a serious situation! Always be prepared to handle situations like these by having the necessary gear, and first aid training, but by also creating space within the group to have the necessary safety conversations before you leave.
Obviously not all situations are preventable, but by simply discussing the reality of injuries in the backcountry amongst your group, can be a helpful reminder for everyone to do their part to work together to keep everyone safe. Injury prevention is always the best solution.
Weather
Weather will also always be one of your biggest risks on the Wapta. It can change quickly and because you may not have access to weather updates, the longer you are out there, the more things can change without your knowledge of what could be about to hit.
Extreme weather is not unheard of on the Wapta. Temperatures can easily get to -40 Celsius or colder and leave people stranded with limited options. White outs and violent storms are also a common occurrence on these icefields. Making hazards like crevasses, avalanches, cliffs and route finding even more complex and dangerous.
Consider what it could be like trying to find one of the Alpine Club huts that you're supposed to be staying at, while in a complete white out. Take steps ahead of time to mitigate these types of risks. The solutions are a lot easier to plan for when you have access to resources and internet, than they are when you’re in the middle of a complex situation.
Wapta Traverse Ski Tour Gear

You need the basic backcountry touring setup with your splitboard or skis, skins, poles, backpack, beacon, probe, shovel, and first aid kit. But then you need the more specific gear for this trip.
Glacier Gear
As this traverses across glacial terrain, you will need your full glacier kit which could include something as simple as a Petzl Rad line setup or something more traditional like a glacier rope, prusiks and prusik minded pulleys along with anchor building supplies like ice screws and snow pickets and of course a harness.
Whatever your gear setup, make sure you and everyone in your group know how to use it! You will also need an ice axe or at minimum a whippet pole attachment to self arrest in case of a fall on your rope team.
Optional Climbing Gear
If you're planning to ascend specific summits you will need gear based on the chosen objective or objectives. This may include things like full vertical ice climbing gear, ascent plates, crampons, ski crampons, and rappelling gear. Know what you need based on your specific objectives.
Satellite Communication
It's a good idea to have some sort of satellite tracking device whether that be a spot or Garmin inReach device which have capabilities to reach emergency search and rescue teams. Some cell phones now come equipped with satellite technology and available membership plans for utilizing satellite communication in the backcountry.
Two way radios are another underrated communication device and definitely worth consideration for a remote backcountry trip like this. If staying at a Alpine Club of Canada hut, your fuel should be provided.
But let's say you get lost, injured or maybe something malfunctions in a hut. It can be a good idea to bring a small stove, pot and some fuel in the case of an emergency amongst the group.
Chances are probably low, but it's good to have the added insurance and peace of mind. If you want to see full video on how to pack for a multi day splitboarding trip check out the link below for another video where we will do a deeper dive into clothing and exactly what I bring for a multi day backcountry trip.
Other Details for the Wapta Traverse

Rope Teams
When planning for Wapta Traverse, make sure to think through your rope team(s). Always thinking about safety when assigning and or choosing team members.
Car Drops
Car drops are a special consideration on the Wapta. Depending on group size and vehicle capacity, you will need a minimum of two vehicles.
Now if you were to do the north to south version of the trip, you would leave a minimum of one vehicle at the Sherbrooke Lake parking lot off of the Trans Canada highway just west of the BC/Alberta border (note that some winters Parks does not plow this parking lot.
Alternative plans will need to be considered and checking ahead with Parks Canada could be a good thing to sort out before leaving).
Then drive all team members north via the Icefields Parkway and park north of the Bow Summit parking lot about 2 kms on the side of the road. There is no formal parking lot, so make sure to pull off to the side as far as you can.
Park Passes
At the time of the writing of this, there are no rules against parking on the side of the road, except that you must have a valid Parks Canada Pass for the duration of the trip. This goes for all vehicles including those left at Sherbrooke Lake parking lot.
These may be purchased at the Banff Gate or at the south end of the Icefield Parkway Highway 93N. However, check ahead to make sure they will be open, especially if you are planning to do an early start! In which case you may want to purchase ahead through pc.gc.ca.
Fuel
A simple but easily overlooked consideration is fuel. Be sure to fuel up at Lake Louise when coming from the east or Field when traveling from the west before dropping vehicles. You don't know what road or driving conditions will be like when you finish, and things can get wild in this part of the world so plan for the worst and be prepared for the potential to be stuck in the parking lot, on the road, or worse yet in a ditch.
Hut Booking

If you are planning to use Alpine Club hut accommodations, there are many options and combinations of huts that you can choose.
A common combination would be the 5 day, 4 night option, staying at Peyto, Bow, Balfour, and Scott Duncan Huts. Peyto and Bow huts are fairly close to each other and therefore some people choose to skip the Bow hut altogether and make it a 4 day, 3 night trip.
Others choose to do it in 2 days, often staying at the Balfour hut for 1 night. Single day pushes of the Wapta are very common place these days. These types of epic days must be undertaken with careful consideration and planning.
Often these pushes are done by starting in the very early hours of the day (middle of the night alpine start) and completed often in the dark the following night. This type of expedition is often done, not as a first time trip, but after having done the Wapta at least once before.
A very careful line consideration, gear, safety, etc must be considered when planning a single day mission of the Wapta and pre training must be taken seriously. If you prefer a more rugged accommodation experience you can snow camp on the Wapta Icefields, but will be required to secure your camping permit from Yoho National Park or Banff National Park.
You will also be required to obtain your backcountry permit which is separate, but can be obtained simultaneously if you plan on spending a night in the backcountry versus the conventional campsites.
In these scenarios you can use a 4 season tent, or even build a quinzee or snow shelter that you can sleep in. Be sure to understand and practice how to build these kinds of shelters prior to leaving so that you know how to build them to be safe and effective.
Food
You will need food for all days of your trip and it can be a good idea to have a little something extra in your pack or even in someone's pack for a multi day trip like the Wapta. Unforeseen things can occur to change the length of the trip such as an injury or weather and the last thing you want is to run out of food.
Plan for breakfast, lunch and dinner and it's nice to bring something as a snack or a treat for each day. Some of my favorite snacks are popcorn that I pop in a pot with coconut oil, cookies, and the always famous chocolate.
Something else I almost always bring is a package of instant mash potatoes. They are very light weight and you can just add hot water to rehydrate. If you're looking for ways to add calories, bring butter, coconut oil or even coconut milk powder or regular milk powder, which incidentally pairs really well with instant oats for breakfast. Also a nice treat!
Extra Comforts
As a last recommendation, I recommend having some creature comforts at the dropped vehicle.
A change of footwear and clothes can be nice, but beyond that I would recommend some beverages and snacks that can be eaten after being frozen for days. Maybe a few lawn chairs if you have a large group and some people have to stay back, while the others go get the vehicle or vehicles from the other end.
A really nice touch is a portable fire pit and a propane tank. Maybe even bring marshmallows or hot dogs and have a roast!
Wapta Traverse Ski Tour Summary

I hope this information helps break down some of the considerations when planning to splitboard or ski the Wapta Traverse! If you’re not currently in a space where the Wapta is an attainable objective, but would like to take on this type of mission, find community, courses, and ways to build up your experiences to a point where this is an adventure that you can take on!
Perhaps hiring a guide is one of the easier ways to take on these types of adventures when you’re starting out. Choose a great group of skilled friends and get out there, prepare, plan, and execute!
Whatever your capacity, I hope that this helps with some of the planning and considerations to be aware of if you are planning to take on this epic adventure that we know as the Wapta Traverse!
Safe travels!
Splitboard HQ Contact
Edmonton: (p) 780 463-4892 (e) info@splitboardhq.com
Calgary: (p) 403 288-9283 (e) info@splitboardhq.com